Window Replacement Inspection Guide
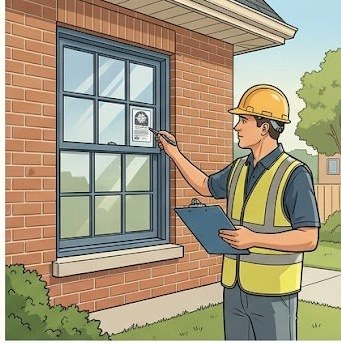
Understanding what a building inspector checks at each stage of a window replacement project is the difference between passing first time and scheduling costly re-inspections. This guide covers every inspection stage with the specific items inspectors verify and the most common failure points.
The Three Inspection Stages
Most window replacement projects have one or two inspections. Egress and structural projects may have three. Understanding which stages apply to your project lets you plan your schedule correctly.
Stage 1: Pre-Construction Inspection (Rare)
A small number of jurisdictions require a pre-construction inspection to document existing conditions before any cutting begins. This is most common for egress projects involving foundation modifications. If required, the inspector photographs the existing opening, measures it, and verifies the scope matches the permit. Ask your building department explicitly whether this is required when you apply — it is easy to miss.
Stage 2: Rough-In Inspection
Required for any project involving structural framing work: egress window enlargements, new openings, or window-to-door conversions. The rough-in inspection happens after framing is complete but before the window is set. What inspectors check:
- Header/lintel: Correct size per engineer's letter or prescriptive IRC tables, properly bearing on king studs on each side (minimum 1.5" bearing per side)
- King studs and jack studs: Properly installed, full-height, not spliced
- Rough opening dimensions: Width and height match the permitted drawings within acceptable tolerance
- Sill framing: Properly supported, not floating
- For foundation work: Lintel properly seated in concrete or block, patching complete, no cracks propagating
- Sill pan flashing: In place before window is set; this is the most commonly missed item at rough-in
Critical rule: Do not set the window before the rough-in inspection. An inspector who arrives to find the window already installed cannot verify the structural work. This frequently results in a requirement to remove the window for inspection, adding significant cost and delay.
Stage 3: Final Inspection
After the window is fully installed. This is the most important inspection and the stage where most failures occur. What inspectors check:
NFRC Label
The inspector reads the NFRC label on the installed window and compares U-factor and SHGC to the permitted specification and local energy code requirements. The label must still be on the window. Removing the NFRC label before the final inspection is the single most preventable cause of failed window inspections — do not remove it until after the inspector signs off.
Flashing and Waterproofing
This is the most common failure category. Inspectors check:
- Sill pan flashing or sill dam is present and properly integrated
- Jamb flashing laps over sill pan flashing (not under it)
- Head flashing installed above window and lapped under the building wrap
- For Florida: product approval installation method followed exactly (anchor spacing and size per FPA document)
- All gaps between window frame and rough opening filled with low-expansion foam or backer rod and caulk
Egress Compliance (If Applicable)
For egress window projects, the inspector physically opens the window and measures net clear opening with a tape measure. They measure height, width, and calculate area. They measure sill height from the finished floor. A window that is 0.1 square feet short of the 5.7 sq ft minimum fails — the window may need to be replaced or the opening enlarged.
Window Well (If Applicable)
For below-grade egress windows, the inspector measures the well dimensions (minimum 36"×36", 9 sq ft), checks for drainage, verifies the cover is openable from inside without tools, and checks for steps/ladder if depth exceeds 44".
Operation and Condition
The inspector opens and closes the window, verifies the lock functions, and checks for obvious installation defects (cracks, broken glazing, frame damage). Windows that don't open freely fail.
Most Common Final Inspection Failures
| Failure | How Common | How to Prevent |
|---|---|---|
| NFRC label removed | Very common | Leave labels on until after inspector signs off |
| Missing or improper head flashing | Very common | Follow manufacturer installation guide; don't improvise |
| Sill pan flashing missing or wrong direction | Common | Verify sill pan in place before window is set |
| Window doesn't match permitted spec (model substitution) | Common | Notify permit office of any product substitution before installation |
| Egress opening marginally short | Common | Use Egress Calculator before ordering; measure rough opening with window open |
| Foam gaps not sealed | Moderate | Fill all gaps between frame and rough opening before trim is installed |
| Window well too small or no drainage | Moderate | Verify well dimensions and drainage before inspection |
How to Schedule Inspections
Most jurisdictions allow inspection scheduling online or by phone. Schedule your rough-in inspection the day framing is completed — don't wait. For final inspections, schedule as soon as the window is installed but before interior trim work is complete. Inspectors need to see the flashing assembly, which is covered by trim. In busy jurisdictions, inspection slots fill 3–7 days out; plan accordingly.
FAQs
Yes, and it is generally a good idea. Being present lets you ask questions, understand any corrections required, and get immediate feedback on what passed and what didn't. You are not required to be present for the inspector to proceed, but your contractor or a knowledgeable representative should be available at the property.
The inspector leaves a correction notice specifying exactly what failed. Address each item specifically and call to schedule a re-inspection. Re-inspection fees range from $0 to $100 for residential work. Most failed final inspections are correctable within a few days — missing flashing installed, label located, minor adjustments made. Contact your contractor to remediate the specific items listed.